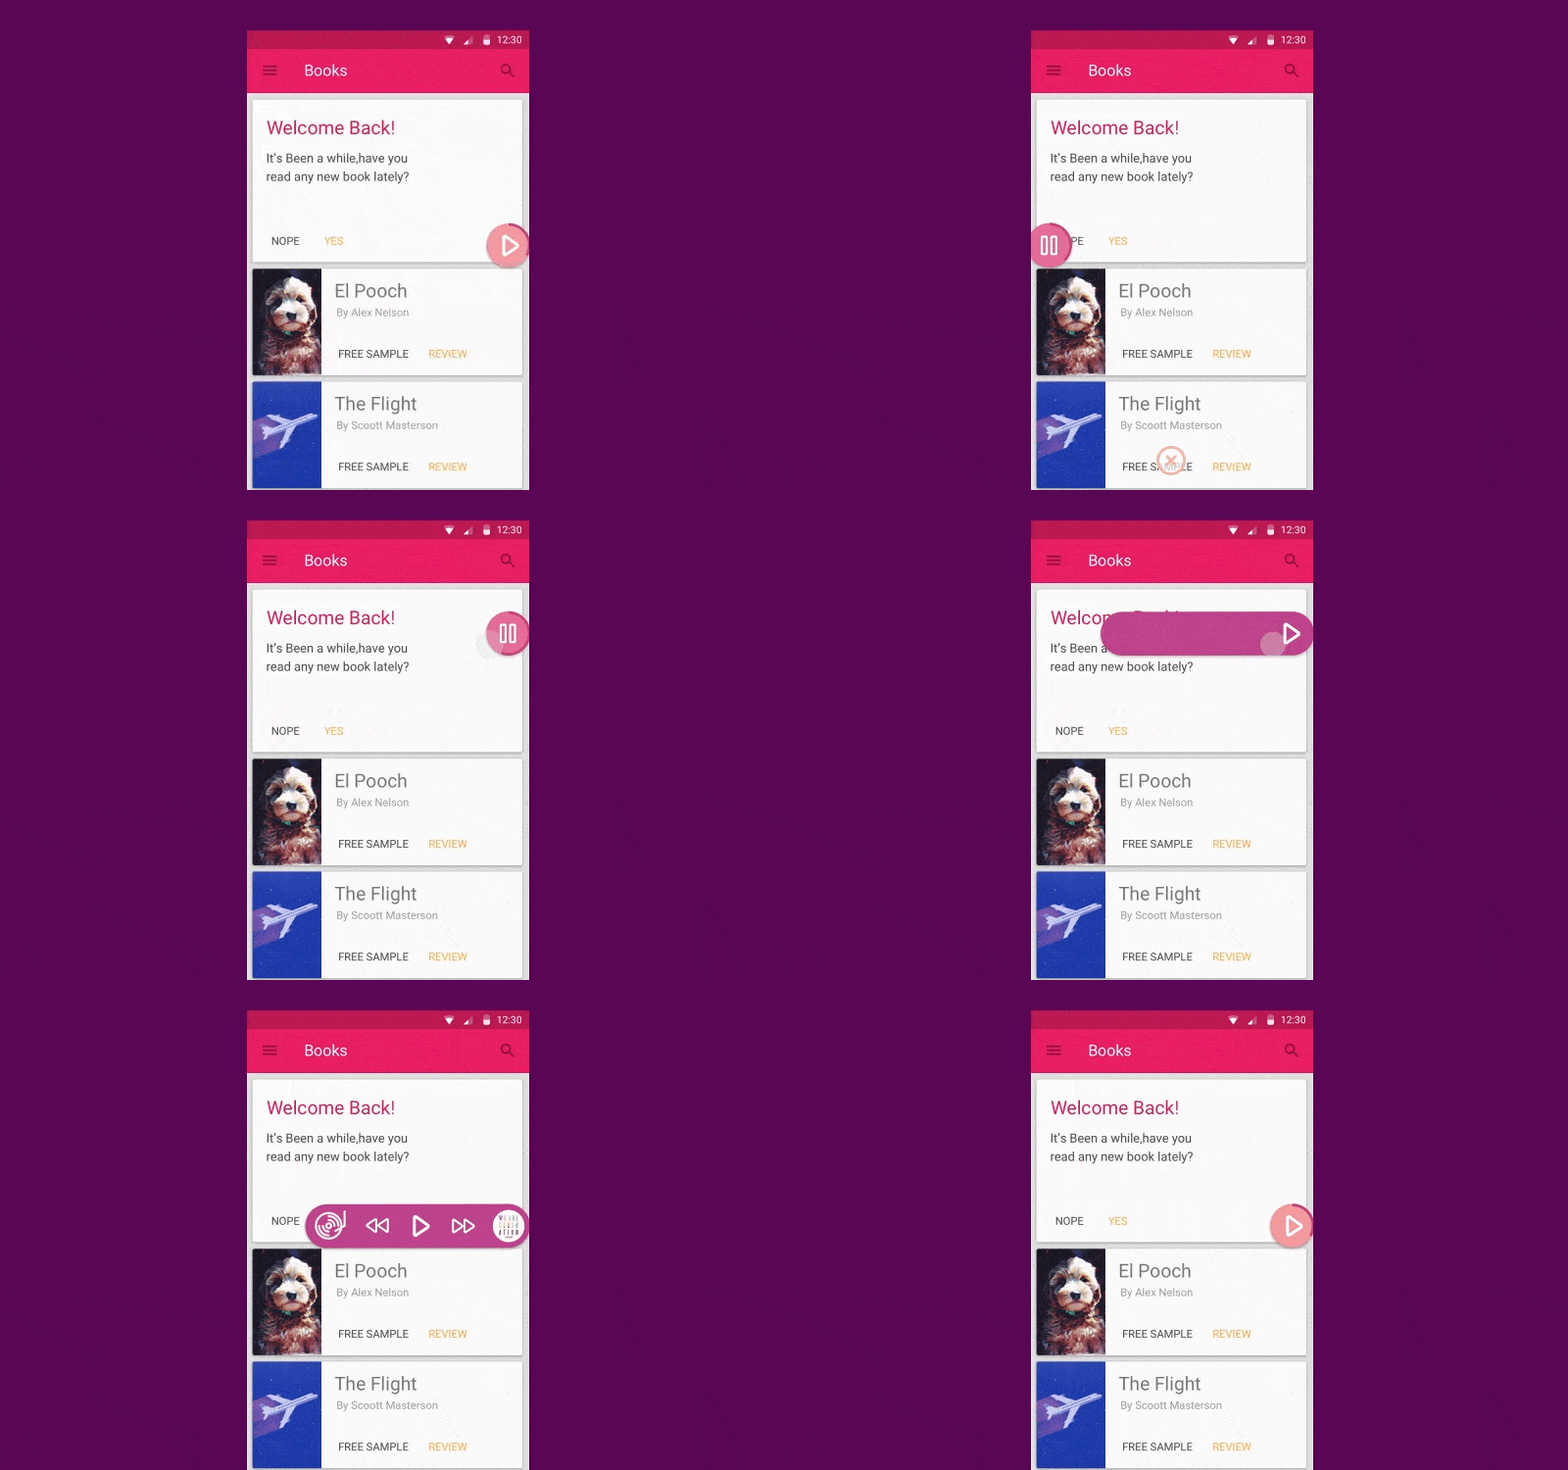
You know, guys, we have become a bit obsessed with music recently. Since we wanted to create a companion to our equalizer and add to the collection of Android widgets, the idea to develop a nice and convenient audio widget was born almost immediately.
You must see : Crumbling Android Image Slider
So if you have already developed a music player and you feel that you want to make it even better, then you’re welcome to use this library and enjoy the results. Let firstly show you the demo :

Now let’s find out what’s behind these juicy audio widget overlay view.
Gradle file
To start, you need to add the following dependency to your project in the build.gradle file:
dependencies {
    compile 'com.cleveroad:audiowidget:0.9.0'
}
Manifest file
As always, to make sure that no user’s data or any other application on a device would be impacted, we need to add two permissions to the app manifest:
<!-- used for drawing widget. This permission must be granted before calling AudioWidget.show(). -->
<uses-permission android:name="android.permission.SYSTEM_ALERT_WINDOW"/>

<!-- used for notifing user that he is about to remove widget when he drags it on remove widget icon. -->
<!-- This permission granted by default on Android 6.0+ devices. -->
<uses-permission android:name="android.permission.VIBRATE"/>
As you can see, the first one will help you draw a widget over other applications. The second one is needed to inform a user that he is about to make a widget disappear when dragging it to the remove icon at the bottom of the screen. Although, the latter is optional.
Lets find out : Is LastAdapter ending RecyclerView adapter?
Widget builder
The next is to create a new instance of your future widget by using the Builder:
AudioWidget audioWidget = new AudioWidget.Builder(context)
        .lightColor(...)
        .darkColor(...)
        .expandWidgetColor(...)
        .progressColor(...)
        .progressStrokeWidth(...)
        .crossColor(...)
        .crossOverlappedColor(...)
        .crossStrokeWidth(...)
        .buttonPadding(...)
        .bubblesMinSize(...)
        .bubblesMaxSize(...)
        .shadowColor(...)
        .shadowRadius(...)
        .shadowDx(...)
        .shadowDy(...)
        .playDrawable(...)
        .pauseDrawable(...)
        .playlistDrawable(...)
        .prevTrackDrawale(...)
        .nextTrackDrawable(...)
        .defaultAlbumDrawable(...)
        .edgeOffsetXCollapsed(...)
        .edgeOffsetYCollapsed(...)
        .edgeOffsetXExpanded(...)
        .edgeOffsetYExpanded(...)
        .build();
Or you can use default configuration. Just call:
AudioWidget audioWidget = new AudioWidget.Builder(context).build();
Create controller(Optional)
If you want to be informed about the events happening at the moment, you can create a Controller (it’s optional, so you decide):
// media buttons' click listener
audioWidget.controller().onControlsClickListener(new AudioWidget.OnControlsClickListener() {
    @Override
    public boolean onPlaylistClicked() {
        // playlist icon clicked
        // return false to collapse widget, true to stay in expanded state
    }

    @Override
    public void onPreviousClicked() {
        // previous track button clicked
    }

    @Override
    public boolean onPlayPauseClicked() {
        // return true to change playback state of widget and play button click animation (in collapsed state)
        return true;
    }

    @Override
    public void onNextClicked() {
        // next track button clicked
    }

    @Override
    public void onAlbumClicked() {
        // album cover clicked
    }

    @Override
    public void onPlaylistLongClicked() {
        // playlist button long clicked
    }

    @Override
    public void onPreviousLongClicked() {
        // previous track button long clicked
    }

    @Override
    public void onPlayPauseLongClicked() {
        // play/pause button long clicked
    }

    @Override
    public void onNextLongClicked() {
        // next track button long clicked
    }

    @Override
    public void onAlbumClicked() {
        // album cover long clicked
    }

    @Override
    public void onAlbumLongClicked() {
        // album cover long clicked
    }
});

// widget's state listener
audioWidget.controller().onWidgetStateChangedListener(new AudioWidget.OnWidgetStateChangedListener() {
    @Override
    public void onWidgetStateChanged(@NonNull AudioWidget.State state) {
        // widget state changed (COLLAPSED, EXPANDED, REMOVED)
    }

    @Override
    public void onWidgetPositionChanged(int cx, int cy) {
        // widget position change. Save coordinates here to reuse them next time AudioWidget.show(int, int) called.
    }
});
Using AudioWidget.Controller, you can set track’s duration, current position or album cover. Also you can set current playback state using start(), pause() or stop() methods. See MusicService class for more info on how to use controller.
Do you know : Disadvantage of Kotlin – You must know before use
Show widget on screen
To show audio widget on screen call AudioWidget.show(int, int) method. To hide it call AudioWidget.hide() method. Very simple!
audioWidget.show(100, 100); // coordinates in pixels on screen from top left corner
...
audioWidget.hide();
Permission handling
...

   // somewhere in your code
   if (Build.VERSION.SDK_INT >= Build.VERSION_CODES.M && !Settings.canDrawOverlays(this)) {
       Intent intent = new Intent(Settings.ACTION_MANAGE_OVERLAY_PERMISSION, Uri.parse("package:" + getPackageName()));
       startActivityForResult(intent, OVERLAY_PERMISSION_REQ_CODE);
   }

   ...

   @Override
   protected void onActivityResult(int requestCode, int resultCode, Intent data) {
       super.onActivityResult(requestCode, resultCode, data);
       if (requestCode == OVERLAY_PERMISSION_REQ_CODE) {
           if (Build.VERSION.SDK_INT >= Build.VERSION_CODES.M && Settings.canDrawOverlays(this)) {
               // now you can show audio widget
           }
       }
   }

   ...
Migration from v.0.9.1 to v.0.9.2
- OnControlsClickListener.onPlaylistClicked should return
trueto consume the action orfalseto use default behavior (collapse the widget) - OnControlsClickListener.onPlayPauseClicked should return
trueto consume the action orfalseto use default behavior (change play/pause state)
Download library project
Hope you like this article and library tutorial.

Share your thoughts