RecyclerView is one of the important widgets in android framework. We can safely say that almost 90% of the android apps out there uses recyclerview. For such a powerful widget, creating adapters for recyclerview needs more boilerplate code. Its not a fault, but framework api has to be generic to cover all the usecases. So it needs more code to set-up.
It is a helper library for recyclerviews to create composable view holders without boilerplate code.
For example(demo):

Gradle Dependency
The Gradle dependency is available via JCenter. JCenter is the default maven repository used by Android Studio.
The minimum API level supported by this library is API 9.
dependencies {
  // ... other dependencies here
    compile 'com.github.devahamed:multi-view-adapter:1.0.1'
}
Why use MultiViewAdapter library?
Most of the android apps out there uses recyclerview to display content. As with any other system-level api, recyclerview api is also designed in a generic way. So it needs lot of code to be written for displaying a simple list. And it doubles, if you need to display multiple view types. MultiViewAdapter library helps you in removing this boilerplate code while allowing you to truly re-use the viewholder code across various adapters.
There are many other libraries, which provides the same feature. But they do enforce the either or all of the following constraints :
- Your POJO classes should extend/implement some Base classes. This forces us to make changes in model level.
- Forces you to implement some boilerplate code – like managing view types by yourself.
- Doesn’t utilise diffutil or payloads from recyclerview api
Now the advantages of the MultiViewAdapter
- No restrictions on POJO class’ parent/hierarchy. Now, your model classes can truly reside inside data layer.
- No need to cast your models, no need for switch/if-else cases when you are having multiple view types.
- Takes advantage of diffutil and allows payload while notifying adapter.
Key concepts
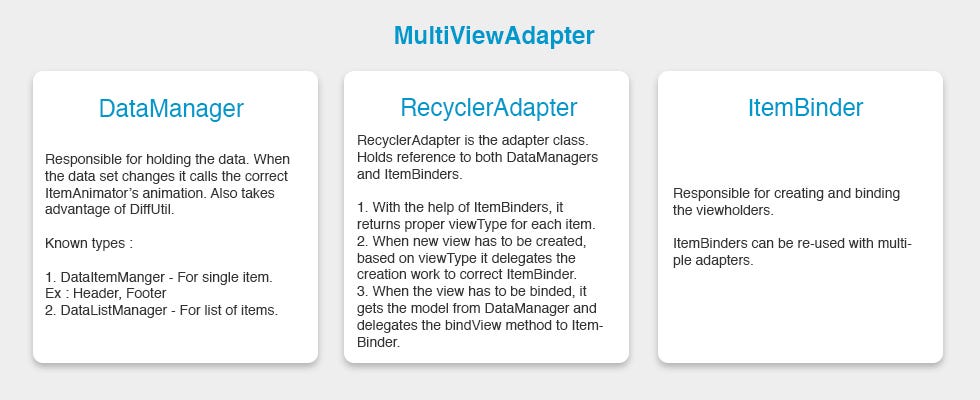
- RecyclerAdapter – This is the adapter class. It can have multiple ItemBinder and DataManagers. It extends from official RecyclerView.Adapter
- ItemBinder – ItemBinder’s responsibility is to create and bind viewholders. ItemBinder has type parameter which accepts the model class need to be displayed. ItemBinder needs to be registered inside RecyclerAdapter. ItemBinder can be registered with multiple adapters.
- DataManger – Consider it as a List. But internally it calls necessary animations when the list is modified. There are two DataManagers. DataListManager for list of items. DataItemManager for a single item (Header, Footer etc.,).
Features
- Supports different span count for different ItemBinders.
- Adds different ItemDecoration for different ItemBinders.
- Items can be selected – Single and Multiple selection options are available.
- Out of the box support for DiffUtil.
Usage
To get some idea about the MultiViewAdapter features kindly look at sample app code.
Simple adapters
Let us display list of cars. No fuss. Here is the entire code.
CarBinder
class CarBinder extends ItemBinder<CarModel, CarBinder.CarViewHolder> {

  @Override public CarViewHolder create(LayoutInflater inflater, ViewGroup parent) {
    return new CarViewHolder(inflater.inflate(R.layout.item_car, parent, false));
  }

  @Override public boolean canBindData(Object item) {
    return item instanceof CarModel;
  }

  @Override public void bind(CarViewHolder holder, CarModel item) {
    // Bind the data here
  }

  static class CarViewHolder extends BaseViewHolder<CarModel> {
    // Normal ViewHolder code
  }
}
CarAdapter
class CarAdapter extends RecyclerAdapter {

  private DataListManager<CarModel> dataManager;

  public SimpleAdapter() {
    this.dataManager = new DataListManager<>(this);
    addDataManager(dataManager);

    registerBinder(new CarBinder());
  }

  public void addData(List<CarModel> dataList) {
    dataManager.addAll(dataList);
  }
}
Now you are good to go. Just create the CarAdapter object and set it to your recyclerview. When addData() method is called it will show the items in recyclerview.
If you want to show multiple viewtypes just create multiple ItemBinders and register inside the adapter.
For different span count in GridLayoutManager
If the GridLayoutManager has different span count for different view types, then override the getSpanSize() method inside ItemBinder.
@Override public int getSpanSize(int maxSpanCount) {
    return 1; // Return any number which is less than maxSpanCount
  }
Also don’t forget to set span size lookup in GridLayoutManager. Adapter has default span size lookup object. Use that object.
layoutManager.setSpanSizeLookup(adapter.getSpanSizeLookup());
ItemDecoration support
Create your own item decoration class implementing ItemDecorator. It goes like this,
public class MyItemDecorator implements ItemDecorator {

  public MyItemDecorator() {
    // Any initialization code
  }

  @Override public void getItemOffsets(Rect outRect, int position, int positionType) {
    // Set item offset for each item
    // outRect.set(0, 0, 0, 0);
  }

  @Override public void onDraw(Canvas canvas, RecyclerView parent, View child, int position,
      int positionType) {
    // Canvas drawing code implementation
    // Unlike default ItemDecoration, this method will be called for individual items. Do not create objects here.
  }
}
The methods, getItemOffsets and onDraw will be called for each item. So avoid creating objects there.
MyItemDecorator will be used with the ItemBinder as follows.
public class CustomItemBinder implements ItemBinder {

  public CustomItemBinder(MyItemDecorator myItemDecorator) {
    super(myItemDecorator);
  }
}
Making RecyclerView selectable
Just extend your adapter from SelectableAdapter instead of RecyclerAdapter. Now the adapter is selectable. To make an ItemBinder as selectable, extend it from SelectableBinder and also extend ViewHolder from SelectableViewHolder.
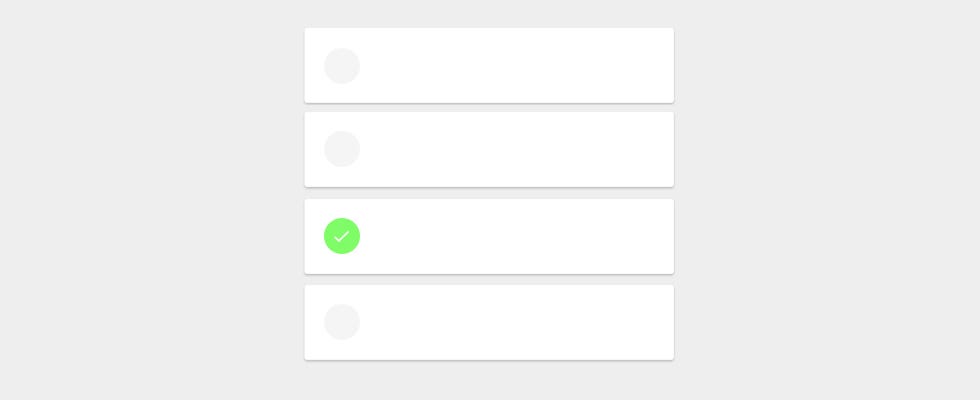
By default, on long press ViewHolder will be selectable if it extends from SelectableViewHolder. You can also call itemSelectionToggled() to make it selected by yourself. Kindly go through the sample repo implementation.
Finally, you can call DataListManager‘s getSelectedItems() and setSelectedItems(List<E> selectedItems) to get and set selected items respectively.
Using DiffUtil and Payload
DataListManager and DataItemManager will take care of diffutil. There is no special code needed. But to enable the payloads, you have to pass PayloadProvider to DataListManager’s constructor.
class CarAdapter extends RecyclerAdapter {

  private DataListManager<CarModel> dataManager;
  private PayloadProvider<M> payloadProvider = new PayloadProvider<CarModel>() {
      @Override public boolean areContentsTheSame(CarModel oldItem, CarModel newItem) {
        // Your logic here
        return oldItem.equals(newItem);
      }

      @Override public Object getChangePayload(CarModel oldItem, CarModel newItem) {
        // Your logic here
        return null;
      }
  };

  public CarAdapter() {
    this.dataManager = new DataListManager<>(this, payloadProvider);
    addDataManager(dataManager);

    registerBinder(new CarBinder());
  }

  public void addData(List<CarModel> dataList) {
    dataManager.addAll(dataList);
  }
}
Final notes
Thanks for reading so far. I hope this article is suffice to get started with the MultiViewAdapter library. Please comment us.

Share your thoughts