After Fingerprint security comes in Android many developers want to use that feature in their app but handle android fingerprint API is a hard task but this library offers an easy way to handle authorisation and encryption tasks using Android Fingerprint APIs.
Handle Android fingerprint API
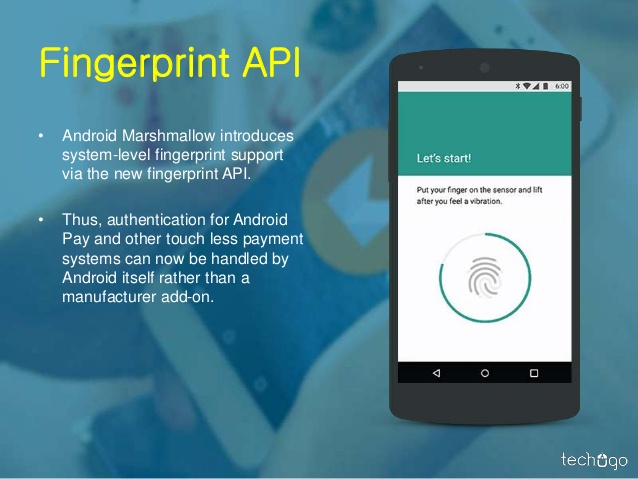
This library can be used to provide basic authentication through fingerprint API, using manual password as backup option. It also allows you to encrypt messages using fingerprint APIs. This library provides a sample to show how it can be used.
Basic use:
You import via gradle from https://jitpack.io add in it to your repositories
allprojects {
   repositories {
     ...
     maven { url 'https://jitpack.io' }
   }
 }
and then adding the library as dependency:
dependencies {
  compile 'com.github.JesusM:FingerprintManager:v1.0'
}
Create the fingerprint manager.
fingerPrintManager = new JFingerprintManager(context, key);
key is the name for the symmetric key that is created in the Android Key Store. JFingerprintManager.InitialisationCallback contains a set of method that are called whether the fingerprint is ready to be used or when there is any error (like no fingerprint has been enrolled yet, or if there has been a problem initialising it).
Once the library is ready to be used, it provides two features: authentication and encryption.
Authentication
Authentication provides the simplest way to authenticate a user. Once it uses its fingerprint scanner, you’ll obtain enough information to allow any operation that requires a user authentication. The library API is pretty simple, just call startAuthentication method passing to it a callback that will let you know the result of the operation. If the authentication went ok, you’ll obtain a CryptoObject object that will let you use for authentication operations (see encryption below to see what you can do with that data)
Logic to authenticate using fingerprint:
fingerPrintManager.startAuthentication(new JFingerprintManager.AuthenticationCallback() {
   @Override
   public void onAuthenticationSuccess(@NonNull FingerprintManagerCompat.CryptoObject cryptoObject) {
       // Logic when authentication has been successful
   }

   @Override
   public void onSuccessWithManualPassword(@NonNull String password) {
       // Logic when authentication has been successful writting password manually
   }

   @Override
   public void onFingerprintNotRecognized() {
       // Logic when fingerprint is not recognised
   }

   @Override
   public void onAuthenticationFailedWithHelp(String help) {
       // Logic when authentication has failed
   }

   @Override
   public void onFingerprintNotAvailable() {
       // Logic when fingerprint is not available
   }
}, getSupportFragmentManager());
Encryption
Authentication will be don only using fingerprint APIs, so if fingerprint is not present or suitable, it will fail.
Logic to encrypt an String message using the library:
fingerPrintManager.encrypt(messageToBeEncrypted, new JFingerprintManager.EncryptCallback() {
    @Override
    public void onFingerprintNotRecognized() {
      // Logic when fingerprint was not recognized not available
    }

    @Override
    public void onAuthenticationFailedWithHelp(String help) {
      // Logic when encryption failed with a message
    }

    @Override
    public void onFingerprintNotAvailable() {
      // Logic when fingerprint is not available
    }

    @Override
    public void onEncryptionSuccess(String messageEncrypted) {
        // Logic to handle the encrypted message
    }

    @Override
    public void onEncryptionFailed() {
        // Logic to handle encryption failed
    }
}, getSupportFragmentManager());
Customisation:
The library allows you to customise how the visual component is displayed. In order to do that, you can follow these steps:
1.- Declare a xml them like this:
<style name ="DialogThemeLight" parent="Theme.AppCompat.Light.Dialog.MinWidth">
      <item name="colorAccent">@color/dialog_light_theme_accent</item>
      <item name="android:colorAccent">@color/dialog_light_theme_accent</item>
      <item name="android:background">@color/dialog_light_theme_background</item>
      <item name="android:textColorPrimary">@color/dialog_light_theme_text_color_primary</item>
      <item name="android:textColorSecondary">@color/dialog_light_theme_text_color_secondary</item>
  </style>
2.- Once you have the theme, the library provides a method to set it:
fingerPrintManager.setAuthenticationDialogStyle(theme);
In the screenshots section you can see some samples of the customisations.
Authentication using fingerprint and manual password using a light theme.


Same screens but this time using a dark theme.


Resources
- Android Fingerprint Authentication: https://developer.android.com/about/versions/marshmallow/android-6.0.html#fingerprint-authentication
Hope your like this post please comment your valuable thoughts.
Share your thoughts