In the previous version of the iPhones first we need to know how to delete photos from our iPhone device for the need of free space for some important apps, music for our enjoyment and also need space for our others images, but nowadays the iPhone comes with a lot of storage space for everything like images, videos, apps, games etc. But now sometimes, we need to know about the complete process of deleting photos permanently from iPhone devices, and the reason is, we have to protect our privacy from other people. But sometimes our young generation want to delete all the images from their iPhone devices because they want to give their iPhone to others people for some time like friends, and family members.
Now you really need to know the process, how to remove photos permanently from your iPhone device.
Before deleting images or anything, you have to create the backup of all these things if you need anytime. If you are connected with the same Apple id on other devices and using iCloud photo library then photos and videos are deleted from all of your devices.
To check how much storage remains left in your device first go to settings>General and then storage.
In this article, I will cover all the methods of deleting photos from your iPhone device and also cover the topic that is, restore the iPhone device from factory settings of your device.
Method 1: Delete Photos From iPhone For Storage/Privacy Purpose
Using this process you can easily delete your photos from your iPhone device for the privacy purpose or for storage purpose.
- First, you have to open the photos application of your device.
- Now select the album that is present on the right bottom side of your screen.

- Now if you are using the iCloud library then you have to select all the photos from your album and if you are not using the iCloud library then select camera roll option.
- Now you have to “select” option that is present on the upper right corner of your device.

- By taking your thumb you can select a photo and then without removing your thumb slide it to the left side.

- While you tap the clock that is present at the top of your screen then leave your thumb in contact with the display of your screen.
- After selecting all the photos from your device you have to click on the delete icon that is present on the lower left corner of your screen.
Method 2:Permanently Delete Photos Form iPhone with SafeWiper
SafeWiper has a wide range of functions and supports all kinds of Smartphone devices ,like Android data eraser and iPhone data eraser , but here ,I’ll just show you how it works with iPhone data erasure, As a professional data wipe software,This app has a great feature of deleting all the photos from your device easily and quickly , once the data is deleted by this software , there is no chance of recovery ,so be careful when you start using the SafeWiper to delete photos for your iPhone, you’d better backup the important data to computer or other devices first .
Now , from here you can get an iPhone photo wipe guide
Step 1: Download and install the SafeWiper and launch it on computer.
Step 2: Use a USB cable to connect your iPhone and computer .
Step 3: Once the phone is successfully recognized by the software ,you can get a menu icon,It will provides you some erasure options and click on an option that meets your needs,(like “Erase Private Data”), them your iPhone will be scanned .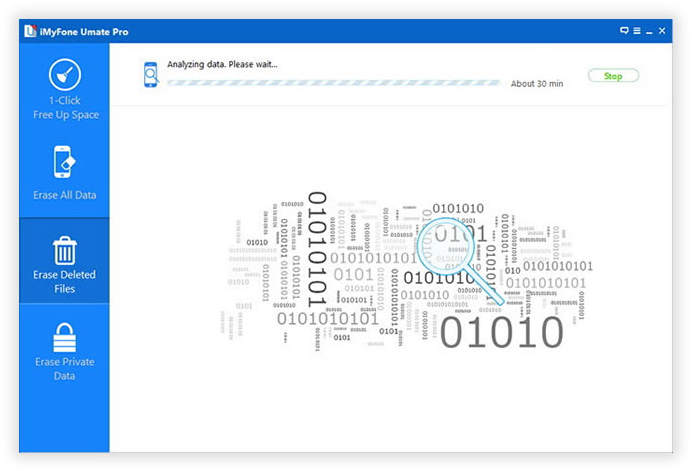
Step 4: After the scan program is completed , You can get all the photos of your iPhone on computer .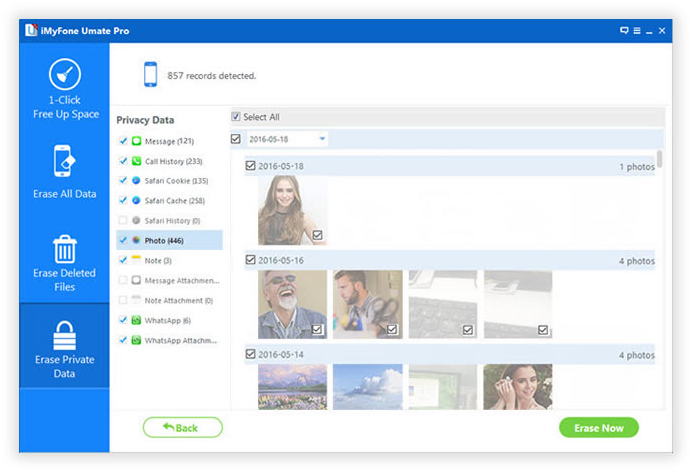
Step 5: Select the photos that you want to erase then click the “Erase”button to erase them from your iPhone, All the photos deleted permanently in this way .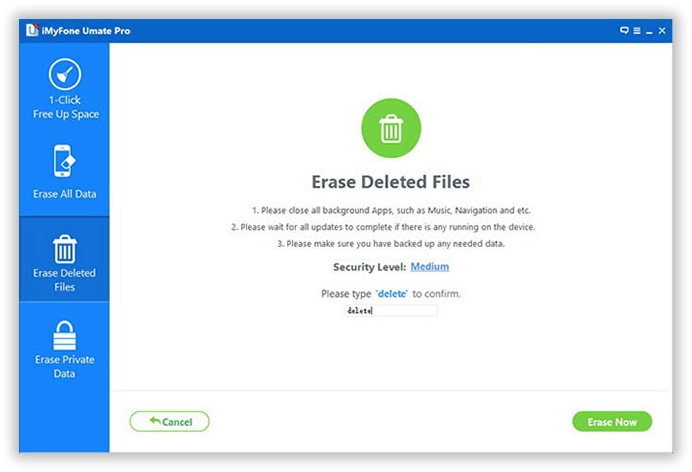
Method 3: Delete Photos From Your iPhone
After the deleting photos from your device, these photos go to your recently deleted folder and these photos will save here for the next 30 days make sure that you also delete all photos from a recently deleted folder.
- Go to photos application and open it.
- Click on the albums button that is present at the right bottom corner of your iPhone display.
- Here you can see the folder named as “Recently deleted”.
- Click on that folder and open it.
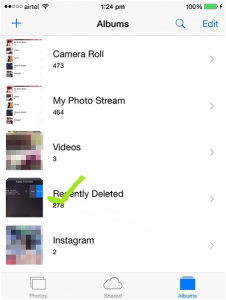
- This folder contains all your previous deleted photos that are automatically saved in this folder for 30 days.
- Now click on the select button that is present on the right corner of your display.

- Select all the photos or the photos that you want to delete permanently
- When you select the photos “Delete” button appears on the left bottom corner of your iPhone display

- Click on the delete button and its final step, with clicking on delete button your selected photos are deleted permanently from your iPhone
Conclusion:
Capturing photos from the iPhone device is a lot of fun for all the people but deleting all these photos is not. But it’s not a difficult thing to delete photos hopefully with this article and all the method that explained in the article you will have no difficulty in deleting photos,as method two says , the SafeWiper can permanently delete photos for your iPhone without recovery , Most importantly, It doesn’t take you long to complete your task , and it can be used to delete other iPhone data , like the text messages ,contacts , videos and other files .
Visit its official website for more information.
Share your thoughts