
Spring Framework Version with their Release Date:
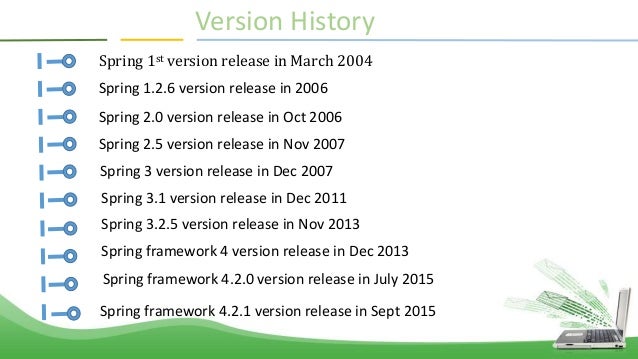
- 5.0.x 2017-10-24
- 4.3.x 2016-06-10
- 4.2.x 2015-07-31
- 4.1.x 2014-09-14
- 4.0.x 2013-12-12
- 3.2.x 2012-12-13
- 3.1.x 2011-12-13
- 3.0.x 2009-12-17
- 2.5.x 2007-12-25
- 2.0.x 2006-10-04
- 1.2.x 2005-05-13
- 1.1.x 2004-09-05
- 1.0.x 2003-03-24
Setup (XML Configuration)
Steps to create Hello Spring:
- Investigate Spring Boot to see if that would better suit your needs.
- Have a project set up with the correct dependencies. It is recommended that you are using Maven or Gradle.
- create a POJO class, e.g. Employee.java
- create a XML file where you can define your class and variables. e.g beans.xml
- create your main class e.g. Customer.java
- Include spring-beans (and its transitive dependencies!) as a dependency.
Employee.java:
package com.test;

public class Employee {
          private String name;

public String getName() {
          return name;

}

public void setName(String name) {
          this.name = name;

}

public void displayName() {

System.out.println(name);
}

}
beans.xml:
<?xml version="1.0" encoding="UTF-8"?>

<beans xmlns="http://www.springframework.org/schema/beans"

xmlns:xsi="http://www.w3.org/2001/XMLSchema-instance"

xsi:schemaLocation="http://www.springframework.org/schema/beans

http://www.springframework.org/schema/beans/spring-beans-4.3.xsd">


<bean id="employee" class="com.test.Employee">

<property name="name" value="test spring"></property>
</bean>


</beans>
Customer.java:
package com.test;

import org.springframework.context.ApplicationContext;

import org.springframework.context.support.ClassPathXmlApplicationContext;

public class Customer {

public static void main(String[] args) {

ApplicationContext context = new ClassPathXmlApplicationContext("beans.xml");

Employee obj = (Employee) context.getBean("employee");

obj.displayName();

}

}
Showcasing Core Spring Framework Features by example
Description
This is a self-contained running example including/showcasing: minimum dependencies needed, Java Configuration, Bean declaration by annotation and Java Configuration, Dependency Injection by Constructor and by Property, and Pre/Post hooks.
Dependencies
These dependencies are needed in the classpath:
Main Class
Starting from the end, this is our Main class that serves as a placeholder for the main() method which initialises the Application Context by pointing to the Configuration class and loads all the various beans needed to showcase
particular functionality.
package com.stackoverflow.documentation;

import org.springframework.context.ApplicationContext;

import org.springframework.context.annotation.AnnotationConfigApplicationContext;

public class Main {


public static void main(String[] args) {


//initializing the Application Context once per application. ApplicationContext applicationContext =

new AnnotationConfigApplicationContext(AppConfig.class);


//bean registered by annotation

BeanDeclaredByAnnotation beanDeclaredByAnnotation =

applicationContext.getBean(BeanDeclaredByAnnotation.class); beanDeclaredByAnnotation.sayHello();


//bean registered by Java configuration file

BeanDeclaredInAppConfig beanDeclaredInAppConfig =

applicationContext.getBean(BeanDeclaredInAppConfig.class); beanDeclaredInAppConfig.sayHello();


//showcasing constructor injection

BeanConstructorInjection beanConstructorInjection =

applicationContext.getBean(BeanConstructorInjection.class); beanConstructorInjection.sayHello();


//showcasing property injection

BeanPropertyInjection beanPropertyInjection =

applicationContext.getBean(BeanPropertyInjection.class); beanPropertyInjection.sayHello();


//showcasing PreConstruct / PostDestroy hooks

BeanPostConstructPreDestroy beanPostConstructPreDestroy =

applicationContext.getBean(BeanPostConstructPreDestroy.class); beanPostConstructPreDestroy.sayHello();

}

}
Application Configuration file
The configuration class is annotated by @Configuration and is used as a parameter in the initialised Application Context. The @ComponentScan annotation at the class level of the configuration class points to a package to be scanned for Beans and dependencies registered using annotations. Finally the @Bean annotation serves as a bean definition in the configuration class.
package com.stackoverflow.documentation;

import org.springframework.context.annotation.Bean;

import org.springframework.context.annotation.ComponentScan;
import org.springframework.context.annotation.Configuration;

@Configuration

@ComponentScan("com.stackoverflow.documentation") public class AppConfig {


@Bean

public BeanDeclaredInAppConfig beanDeclaredInAppConfig() {
          return new BeanDeclaredInAppConfig();

}

}
Bean Declaration by Annotation
The @Component annotation serves to demarcate the POJO as a Spring bean available for registration during component scanning.
@Component

public class BeanDeclaredByAnnotation {

public void sayHello() {

System.out.println("Hello, World from BeanDeclaredByAnnotation !");
}

}
Bean Declaration by Application Configuration
Notice that we don’t need to annotate or otherwise mark our POJO since the bean declaration/definition is happening in the Application Configuration class file.
public class BeanDeclaredInAppConfig {

public void sayHello() {

System.out.println("Hello, World from BeanDeclaredInAppConfig !");
}

}
Constructor Injection
Notice that the @Autowired annotation is set at the constructor level. Also notice that unless explicitely defined by name the default autowiring is happening based on the type of the bean (in this instance BeanToBeInjected).
package com.stackoverflow.documentation;

import org.springframework.beans.factory.annotation.Autowired; import org.springframework.stereotype.Component;

@Component

public class BeanConstructorInjection {

private BeanToBeInjected dependency;

@Autowired

public BeanConstructorInjection(BeanToBeInjected dependency) {
          this.dependency = dependency;

}

public void sayHello() {

System.out.print("Hello, World from BeanConstructorInjection with dependency: "); dependency.sayHello();

}

}
Property Injection
Notice that the @Autowired annotation demarcates the setter method whose name follows the JavaBeans standard.
package com.stackoverflow.documentation;

import org.springframework.beans.factory.annotation.Autowired; import org.springframework.stereotype.Component;

@Component

public class BeanPropertyInjection {

private BeanToBeInjected dependency;

@Autowired

public void setBeanToBeInjected(BeanToBeInjected beanToBeInjected) {
          this.dependency = beanToBeInjected;

}

public void sayHello() {

System.out.println("Hello, World from BeanPropertyInjection !");
}

}
PostConstruct / PreDestroy hooks
We can intercept initialisation and destruction of a Bean by the @PostConstruct and @PreDestroy hooks. package com.stackoverflow.documentation;
import org.springframework.stereotype.Component;

import javax.annotation.PostConstruct;
import javax.annotation.PreDestroy;

@Component

public class BeanPostConstructPreDestroy {

@PostConstruct

public void pre() {

System.out.println("BeanPostConstructPreDestroy - PostConstruct");
}

public void sayHello() {

System.out.println(" Hello World, BeanPostConstructPreDestroy !");
}

@PreDestroy

public void post() {

System.out.println("BeanPostConstructPreDestroy - PreDestroy");
}

}
Next >> What is Spring Framework, why should we go for it?
Share your thoughts