Sometime we need to add a TableView for Android application and that table may be large with row and column. And for this we discuss about this situation in our previous article named as Android AdaptiveTableLayout CSV Library which makes it possible to CSV file to tableview conversion.
But if you want to add tableview for Android without CSV file then this library is for you. This library named as TableView which is a powerful Android library for displaying complex data structures and rendering tabular data composed of rows, columns and cells.
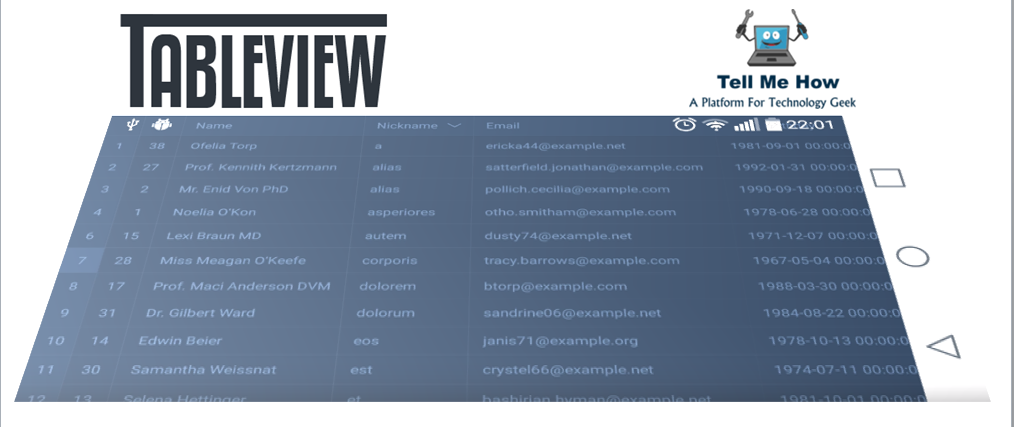
TableView relies on a separate model object to hold and represent the data it displays. This repository also contains a sample app that is designed to show you how to create your own TableView in your application.
Features of TableView for Android
- Each column width value can be calculated automatically considering the largest one
- Setting your own model class to displayed in a table view easily.
- TableView has an click listener to listen user touch interaction for each cell.
- TableView columns can be sorted ascendingly or descendingly. (NEW)
- Hiding & Showing the row is pretty easy. (NEW)
[tmh_article_ads]
Installation
To use this library in your android project, just simply add the following dependency into your build.gradle
dependencies {
 compile 'com.evrencoskun.library:tableview:0.8.5.1'
}
Download
Implement your item on TableView
Create your TableView for Android
XML
<com.evrencoskun.tableview.TableView
    android:id="@+id/content_container"
    android:layout_width="match_parent"
    android:layout_height="wrap_content"/>
As default constants can be set programmatically, it can be set by also using xml attributes of TableView like this;
<com.evrencoskun.tableview.TableView
    android:id="@+id/content_container"
    android:layout_width="match_parent"
    android:layout_height="wrap_content"

    app:column_header_height="@dimen/column_header_height"
    app:row_header_width="@dimen/row_header_width"
    app:selected_color="@color/selected_background_color"
    app:shadow_color="@color/shadow_background_color"
    app:unselected_color="@color/unselected_background_color"
/>
Note: To be able use these attributes on xml side, below xmlns: line should be added on root view. Otherwise, android studio gives you compile error.
xmlns:app="http://schemas.android.com/apk/res-auto"
Programmatically
TableView tableView = new TableView(getContext());
Create your TableViewAdapter
Firstly, you must create your custom TableView Adapter which extends from AbstractTableAdapter class.AbstractTableAdapter class wants 3 different lists which represent respectively; ColumnHeader, RowHeader and Cell views model.
[tmh_article_ads]
For example;
public class MyTableViewAdapter extends AbstractTableAdapter<ColumnHeader, RowHeader, Cell> {

    public MyTableViewAdapter(Context pContext) {
        super(pContext);

    }

    /**
     * This is sample CellViewHolder class
     * This viewHolder must be extended from AbstractViewHolder class instead of RecyclerView.ViewHolder.
     */
     class MyCellViewHolder extends AbstractViewHolder {

         public final TextView cell_textview;

         public MyCellViewHolder(View itemView) {
             super(itemView);
             cell_textview = (TextView) itemView.findViewById(R.id.cell_data);
         }
     }


    /**
     * This is where you create your custom Cell ViewHolder. This method is called when Cell
     * RecyclerView of the TableView needs a new RecyclerView.ViewHolder of the given type to
     * represent an item.
     *
     * @param viewType : This value comes from #getCellItemViewType method to support different type
     *                 of viewHolder as a Cell item.
     *
     * @see #getCellItemViewType(int);
     */
    @Override
    public RecyclerView.ViewHolder onCreateCellViewHolder(ViewGroup parent, int viewType) {
        // Get cell xml layout
        View layout = LayoutInflater.from(m_jContext).inflate(R.layout.my_cell_layout,
                parent, false);
        // Create a Custom ViewHolder for a Cell item.
        return new MyCellViewHolder(layout);
    }

    /**
     * That is where you set Cell View Model data to your custom Cell ViewHolder. This method is
     * Called by Cell RecyclerView of the TableView to display the data at the specified position.
     * This method gives you everything you need about a cell item.
     *
     * @param holder       : This is one of your cell ViewHolders that was created on
     *                     ```onCreateCellViewHolder``` method. In this example we have created
     *                     "MyCellViewHolder" holder.
     * @param pValue     : This is the cell view model located on this X and Y position. In this
     *                     example, the model class is "Cell".
     * @param pXPosition : This is the X (Column) position of the cell item.
     * @param pYPosition : This is the Y (Row) position of the cell item.
     *
     * @see #onCreateCellViewHolder(ViewGroup, int);
     */
    @Override
    public void onBindCellViewHolder(AbstractViewHolder holder, Object pValue, int
            pXPosition, int pYPosition) {
        Cell cell = (Cell) pValue;

        // Get the holder to update cell item text
        MyCellViewHolder viewHolder = (MyCellViewHolder) holder;
        viewHolder.cell_textview.setText(cell.getData());

        // If your TableView should have auto resize for cells & columns.
        // Then you should consider the below lines. Otherwise, you can ignore them.

        // It is necessary to remeasure itself.
        viewHolder.ItemView.getLayoutParams().width = LinearLayout.LayoutParams.WRAP_CONTENT;
        viewHolder.cell_textview.requestLayout();
    }


    /**
     * This is sample CellViewHolder class.
     * This viewHolder must be extended from AbstractViewHolder class instead of RecyclerView.ViewHolder.
     */
     class MyColumnHeaderViewHolder extends AbstractViewHolder {

       public final TextView cell_textview;

       public MyColumnHeaderViewHolder(View itemView) {
          super(itemView);
          cell_textview = (TextView) itemView.findViewById(R.id.cell_data);
       }
     }

    /**
     * This is where you create your custom Column Header ViewHolder. This method is called when
     * Column Header RecyclerView of the TableView needs a new RecyclerView.ViewHolder of the given
     * type to represent an item.
     *
     * @param viewType : This value comes from "getColumnHeaderItemViewType" method to support
     *                 different type of viewHolder as a Column Header item.
     *
     * @see #getColumnHeaderItemViewType(int);
     */
    @Override
    public RecyclerView.ViewHolder onCreateColumnHeaderViewHolder(ViewGroup parent, int viewType) {

        // Get Column Header xml Layout
        View layout = LayoutInflater.from(m_jContext).inflate(R.layout
                .table_view_column_header_layout, parent, false);

        // Create a ColumnHeader ViewHolder
        return new MyColumnHeaderViewHolder(layout);
    }

    /**
     * That is where you set Column Header View Model data to your custom Column Header ViewHolder.
     * This method is Called by ColumnHeader RecyclerView of the TableView to display the data at
     * the specified position. This method gives you everything you need about a column header
     * item.
     *
     * @param holder   : This is one of your column header ViewHolders that was created on
     *                 ```onCreateColumnHeaderViewHolder``` method. In this example we have created
     *                 "MyColumnHeaderViewHolder" holder.
     * @param pValue : This is the column header view model located on this X position. In this
     *                 example, the model class is "ColumnHeader".
     * @param position : This is the X (Column) position of the column header item.
     *
     * @see #onCreateColumnHeaderViewHolder(ViewGroup, int) ;
     */
    @Override
    public void onBindColumnHeaderViewHolder(AbstractViewHolder holder, Object pValue, int
            position) {
        ColumnHeader columnHeader = (ColumnHeader) pValue;

        // Get the holder to update cell item text
        MyColumnHeaderViewHolder columnHeaderViewHolder = (MyColumnHeaderViewHolder) holder;
        columnHeaderViewHolder.column_header_textview.setText(columnHeader.getData());

        // If your TableView should have auto resize for cells & columns.
        // Then you should consider the below lines. Otherwise, you can ignore them.

        // It is necessary to remeasure itself.
        columnHeaderViewHolder.column_header_container.getLayoutParams().width = LinearLayout
                .LayoutParams.WRAP_CONTENT;
        columnHeaderViewHolder.column_header_textview.requestLayout();
    }

    /**
     * This is sample CellViewHolder class.
     * This viewHolder must be extended from AbstractViewHolder class instead of RecyclerView.ViewHolder.
     */
     class MyRowHeaderViewHolder extends AbstractViewHolder {

        public final TextView cell_textview;

        public MyRowHeaderViewHolder(View itemView) {
           super(itemView);
           cell_textview = (TextView) itemView.findViewById(R.id.cell_data);
        }
     }


    /**
     * This is where you create your custom Row Header ViewHolder. This method is called when
     * Row Header RecyclerView of the TableView needs a new RecyclerView.ViewHolder of the given
     * type to represent an item.
     *
     * @param viewType : This value comes from "getRowHeaderItemViewType" method to support
     *                 different type of viewHolder as a row Header item.
     *
     * @see #getRowHeaderItemViewType(int);
     */
    @Override
    public RecyclerView.ViewHolder onCreateRowHeaderViewHolder(ViewGroup parent, int viewType) {

        // Get Row Header xml Layout
        View layout = LayoutInflater.from(m_jContext).inflate(R.layout
                .table_view_row_header_layout, parent, false);

        // Create a Row Header ViewHolder
        return new MyRowHeaderViewHolder(layout);
    }


    /**
     * That is where you set Row Header View Model data to your custom Row Header ViewHolder. This
     * method is Called by RowHeader RecyclerView of the TableView to display the data at the
     * specified position. This method gives you everything you need about a row header item.
     *
     * @param holder   : This is one of your row header ViewHolders that was created on
     *                 ```onCreateRowHeaderViewHolder``` method. In this example we have created
     *                 "MyRowHeaderViewHolder" holder.
     * @param pValue : This is the row header view model located on this Y position. In this
     *                 example, the model class is "RowHeader".
     * @param position : This is the Y (row) position of the row header item.
     *
     * @see #onCreateRowHeaderViewHolder(ViewGroup, int) ;
     */
    @Override
    public void onBindRowHeaderViewHolder(AbstractViewHolder holder, Object pValue, int
            position) {
        RowHeader rowHeader = (RowHeader) pValue;

        // Get the holder to update row header item text
        MyRowHeaderViewHolder rowHeaderViewHolder = (MyRowHeaderViewHolder) holder;
        rowHeaderViewHolder.row_header_textview.setText(rowHeader.getData());
    }


    @Override
    public View onCreateCornerView() {
        // Get Corner xml layout
        return LayoutInflater.from(m_jContext).inflate(R.layout.table_view_corner_layout, null);
    }

    @Override
    public int getColumnHeaderItemViewType(int pXPosition) {
        // The unique ID for this type of column header item
        // If you have different items for Cell View by X (Column) position,
        // then you should fill this method to be able create different
        // type of CellViewHolder on "onCreateCellViewHolder"
        return 0;
    }

    @Override
    public int getRowHeaderItemViewType(int pYPosition) {
        // The unique ID for this type of row header item
        // If you have different items for Row Header View by Y (Row) position,
        // then you should fill this method to be able create different
        // type of RowHeaderViewHolder on "onCreateRowHeaderViewHolder"
        return 0;
    }

    @Override
    public int getCellItemViewType(int pXPosition) {
        // The unique ID for this type of cell item
        // If you have different items for Cell View by X (Column) position,
        // then you should fill this method to be able create different
        // type of CellViewHolder on "onCreateCellViewHolder"
        return 0;
    }
}
Set the Adapter to the TableView
AbstractTableAdapter class wants 3 different lists which represent respectively; ColumnHeader, RowHeader and Cell views model.
You must see this : Add Android Timeline View Library
Assume that we have 3 below list items.
private List<RowHeader> mRowHeaderList;
 private List<ColumnHeader> mColumnHeaderList;
 private List<List<Cell>> mCellList;
Setting datas using our TableView adapter like this;
TableView tableView = new TableView(getContext());

// Create our custom TableView Adapter
MyTableViewAdapter adapter = new MyTableViewAdapter(getContext());
// Set this adapter to the our TableView
tableView.setAdapter(adapter);

// Let's set datas of the TableView on the Adapter
 adapter.setAllItems(mColumnHeaderList, mRowHeaderList, mCellList);
Set Click listener to the TableView
public class MyTableViewListener implements ITableViewListener {

    /**
     * Called when user click any cell item.
     *
     * @param pCellView  : Clicked Cell ViewHolder.
     * @param pXPosition : X (Column) position of Clicked Cell item.
     * @param pYPosition : Y (Row) position of Clicked Cell item.
     */
    @Override
    public void onCellClicked(@NonNull RecyclerView.ViewHolder pCellView, int pXPosition, int
            pYPosition) {
        // Do want you want.
    }

    /**
     * Called when user click any column header item.
     *
     * @param pColumnHeaderView : Clicked Column Header ViewHolder.
     * @param pXPosition        : X (Column) position of Clicked Column Header item.
     */
    @Override
    public void onColumnHeaderClicked(@NonNull RecyclerView.ViewHolder pColumnHeaderView, int
            pXPosition) {
        // Do want you want.
    }

    /**
     * Called when user click any column header item.
     *
     * @param pColumnHeaderView : Long pressed Column Header ViewHolder.
     * @param pXPosition        : X (Column) position of Clicked Column Header item.
     * @version 0.8.5.1
     */
    @Override
    public void onColumnHeaderLongPressed(@NonNull RecyclerView.ViewHolder pColumnHeaderView, int
             pXPosition) {
         // Do want you want.
    }

    /**
     * Called when user click any Row Header item.
     *
     * @param pRowHeaderView : Clicked Row Header ViewHolder.
     * @param pYPosition     : Y (Row) position of Clicked Row Header item.
     */
    @Override
    public void onRowHeaderClicked(@NonNull RecyclerView.ViewHolder pRowHeaderView, int
            pYPosition) {
        // Do want you want.

    }


    /**
     * Called when user click any Row Header item.
     *
     * @param pRowHeaderView : Long pressed Row Header ViewHolder.
     * @param pYPosition     : Y (Row) position of Clicked Row Header item.
     * @version 0.8.5.1
     */
    @Override
    public void onRowHeaderLongPressed(@NonNull RecyclerView.ViewHolder pRowHeaderView, int
             pYPosition) {
         // Do want you want.

    }
}
Setting the listener to the TableView
tableView.setTableViewListener(new MyTableViewListener());
Sorting
TableView has a sorting functionality with 0.8.5.1 version. TableView for Android does not store or copy the data in its TableModel; instead it maintains a map from the row indexes of the view to the row indexes of the model.
ISortableModel to your Cell Model
To be able use this feature on your TableView. You have to implement ISortableModel to your Cell Model. This interface wants two methods from your cell model. These are ;
java String getId(): To compare sorted items ordered by normal items in terms of “are Items The Same”java Object getContent(): To compare sorted items ordered by normal items in terms of “are Contents The Same”
[tmh_article_ads]
As you seen getContent value returns Object. TableView controls the type of the object. And It sorts by considering to the type of class. So you can sort any type of value. Such as;
- Number
- String
- Date
- Boolean
- Comparable
Did you know : Top 10 Programming Architectural Patterns
AbstractSorterViewHolder to your Column Header ViewHolder
AbstractSorterViewHolder helps to listen to change of sorting actions. So you can do whatever you want on any sorting state.
java onSortingStatusChanged(SortState pSortState): It will be called each sorting process. Note : It will be also called every recycling process.java SortState getSortState(): It gives current Sorting state.
Sorting States
/**
     * Enumeration value indicating the items are sorted in increasing order.
     * For example, the set <code>1, 4, 0</code> sorted in
     * <code>ASCENDING</code> order is <code>0, 1, 4</code>.
     */
     ASCENDING,

    /**
     * Enumeration value indicating the items are sorted in decreasing order.
     * For example, the set <code>1, 4, 0</code> sorted in
     * <code>DESCENDING</code> order is <code>4, 1, 0</code>.
     */
    DESCENDING,

    /**
     * Enumeration value indicating the items are unordered.
     * For example, the set <code>1, 4, 0</code> in
     * <code>UNSORTED</code> order is <code>1, 4, 0</code>.
     */
    UNSORTED
Helper methods for sorting process
Several helper methods have been inserted on TableView. These are;
java sortColumn(int pColumnPosition, SortState pSortState): To sortjava SortState getSortingStatus(int column): To get current state of the column
Change your TableView model
TableView has some helper functions to change desired cell item model easily with 0.8.5.1 version. These are;
java addRow(int pYPosition, YourRowHeaderModel pRowHeaderItem, List<YourCellItemModel> pCellItems)java addRowRange(int pYPositionStart, int pItemCount, List<YourRowHeaderModel> pRowHeaderItem, List<List<YourCellItemModel>> pCellItems))java removeRow(int pYPosition)java removeRowRange(int pYPositionStart, int pItemCount)java changeRowHeaderItem(int pYPosition, YourRowHeaderModel pRowHeaderModel)java changeRowHeaderItemRange(int pYPositionStart, int pItemCount, List<YourRowHeaderModel>pRowHeaderModelList)java changeCellItem(int pXPosition, int pYPosition, YourCellItemModel pCellModel)java changeColumnHeader(int pXPosition, YourColumnHeaderModel pColumnHeaderModel)java changeColumnHeaderRange(int pXPositionStart, int pItemCount, List<YourColumnHeaderModel>pColumnHeaderModelList)
Hiding & Showing the Row
With 0.8.5.1 version, hiding and showing any of row is pretty easy for TableView for Android. For that several helper methods have been insereted on TableView.
java showRow(int row): To show the rowjava hideRow(int row): To Hide the rowjava showAllHiddenRows(): To show all hidden rowsjava clearHiddenRowList(): TableView store a map that contains all hidden rows. This method for the time that is necessary to clear the list.java isRowVisible(int row): To check state of row
Advanced Usage
To recalculate the desired column. Sample app shows also its usage as well.
remeasureColumnWidth(int column);
To ignore column width calculation for better performance, the below line can be used.
tableView.setHasFixedWidth(false);
To ignore setting selection colors that are displayed by user interaction, the below line can be used.
tableView.setIgnoreSelectionColors(false);
To show or hide separators of the TableView, you can simply use these helper methods.
setShowHorizontalSeparators(boolean pShowSeparators)
setShowVerticalSeparators(boolean pShowSeparators)
That’s it !! Hope you enjoy this article and share with your friends.
Share your thoughts